Roon Server on Synology Diskstations

If your Diskstation meets the requirements, you can use it as your Roon Core.

Please be aware, that most Synology Diskstations are below the recommended specification. It depends on your use case: Roon offers some cpu intensive features, such as audio upsampling, room correction and other digital signal processing tasks. When you would like to use these features, stream to multiple zones simultaniously or import a large library, the CPU of your diskstation might not be powerful enough.

If you are unsure, if your diskstation is capable of handling your setup, the best way to ensure this, to just give it a try.

Roon Labs hardware recommendation can be read here.

Requirements:

  • Intel x64 based Diskstation
  • DSM 6.x

Recommended:

  • An intel i3 – i7 cpu
  • SSD storage for Roon Server’s database
    • SSD in an internal tray
    • connect a SSD by USB to one of your USB ports

Known Issues:

  • Roon Server has issues with Synology’s vSwitch feature on DSM6. If you have it enabled, Roon Server will not detect any Airplay, Chromecast, and Squeezebox devices.
Preparation

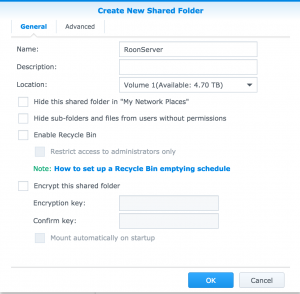
When you install Roon Server on your NAS, it will store its databases on a share called “RoonServer”. This shared folder needs to be created before installing the app.

To do so, open “Control Panel” in the DSM administration and click on “Shared Folder”.

If you’d like to create a new shared folder on one of your internal disks, click the “Create” button. In the new window you can fill “RoonServer” as the shared folder name and specify the internal volume (if there is more than one volume present in your diskstation).

If you’d like to use a USB volume, it will already be in the shared folder list and will probably labeled as usbshare1. To use it as a storage for Roon Server’s database, you need to rename it to “RoonServer”. This can be done by selecting the shared folder in the list and click the “Edit”-button.

To install third-party packages in the Synology Package Center, you need to adjust the trust-level settings in the Package Center Settings.

Click on the settings button in the package center and change the trust level to “Any publisher”.

Getting log files
Manually getting Roon Server's log files

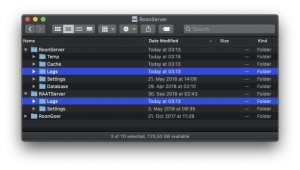
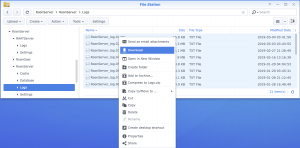
You can manually download Roon Server’s log files. Access your database storage location with your computer (or use Synology’s File Station). The log files are stored in the Logs folder in the RoonServer and RAATServer directory.

Download

Installer for Synology DSM 7.x (x64)Installer for Synology DSM 6.x (x64)

Download Legacy Installer (1.8)

Legacy Installer (DSM7)Legacy Installer (DSM6)

Download Early Access Installer

Early Access Installer (DSM7)Early Access Installer (DSM6)
Changelog
  • Updated Roon icons
  • fixed an installation issue, where Roon Server could not be downloaded, caused by a URL redirect.
  • Fixed issue of Roon Server asking for authorization after reboot
  • Added option for offline install (instructions will follow)
  • Added error messages to be hopefully helpful this time
  • Rewritten text in the installation wizard to be more clear
  • The Synology RoonServer log file is now stored in the root directory of the database directory
  • More logging info, that might be helpful for debugging issues
  • Increased inodes to a million at launch.